How to Remove Mold From Bathroom Ceiling Safely and Effectively
How to remove mold from bathroom ceiling is one of the most common questions homeowners ask, especially in humid climates like Florida. That dark, fuzzy growth creeping across your bathroom ceiling is more than an eyesore. It is a sign of excess moisture, poor ventilation, and a potential health hazard that needs to be addressed as soon as possible. The good news is that with the right tools, cleaning solutions, and safety precautions, you can tackle small mold patches on your own. This guide walks you through everything you need to know, from spotting early signs to preventing regrowth. If you want to understand the full connection between water moisture and mold growth in your home, this deep dive on mold and water damage will give you the bigger picture.
Why Does Mold Grow on Bathroom Ceilings?
Bathroom ceilings are a prime spot for mold because of one simple reason: moisture. Every hot shower sends steam rising upward, and if your bathroom lacks proper ventilation, that humidity settles on the ceiling and stays there. Over time, the surface becomes damp enough to support mold spores, which are naturally present in the air around us.
Common reasons mold grows on bathroom ceilings include inadequate exhaust fans or no exhaust fan at all, steam from long showers with the door closed, roof leaks or pipe leaks above the ceiling, and poor air circulation in small or enclosed bathrooms.
Homes in Florida face a higher risk because of the naturally high outdoor humidity. Even when you are not showering, ambient moisture can seep in and keep ceiling surfaces slightly damp, giving mold a year round opportunity to grow.
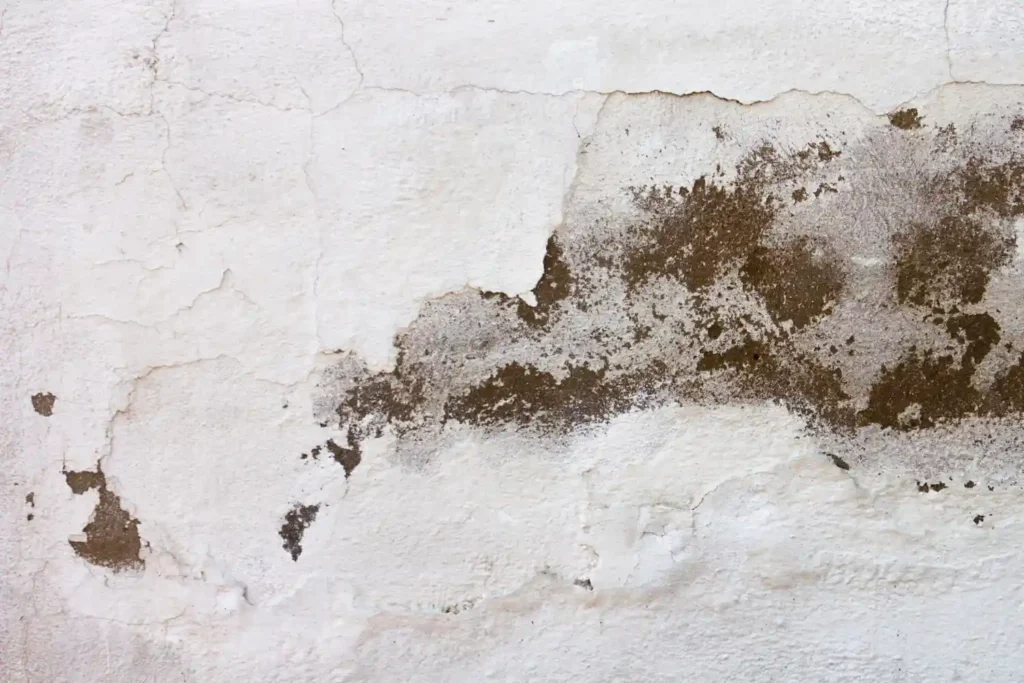
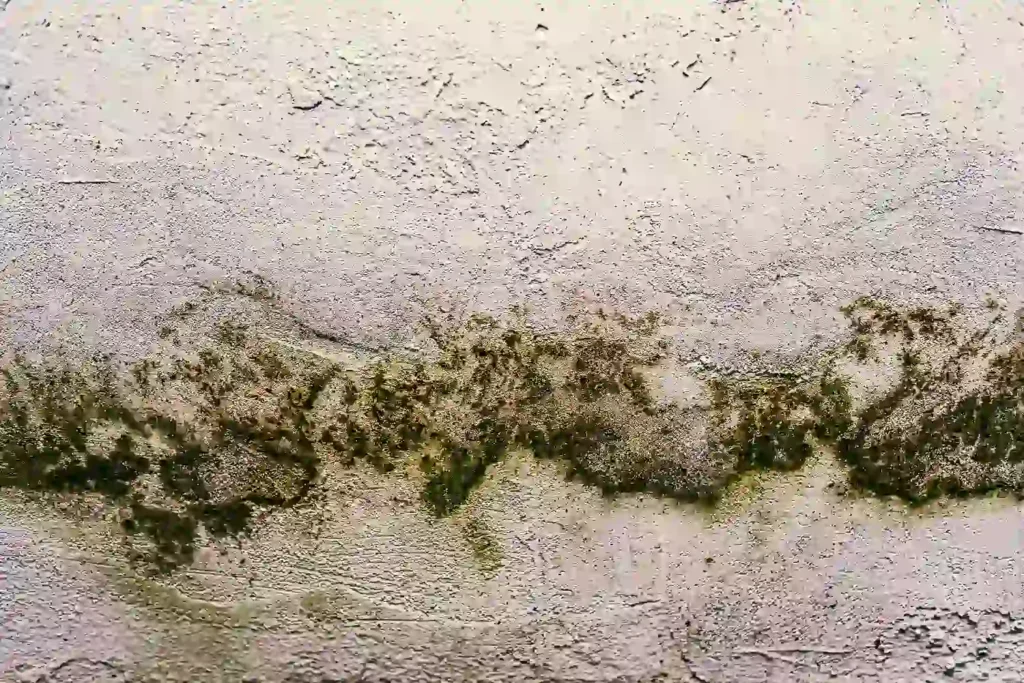
Signs You Have Mold on Your Bathroom Ceiling
Before you clean, you need to confirm what you are dealing with. Mold on bathroom ceilings typically appears as black, green, or grey spots or patches. It may look fuzzy or have a powdery texture. In some cases, you might notice the mold before you see it because the bathroom will have a musty or earthy smell that does not go away even after cleaning.
Watch for these early warning signs:
Discoloration that spreads over time is a red flag. If you notice water stains or rings on the ceiling alongside dark spots, there may be a leak above, not just a ventilation problem. Peeling paint or bubbling surfaces can also indicate that moisture has been trapped underneath for some time.
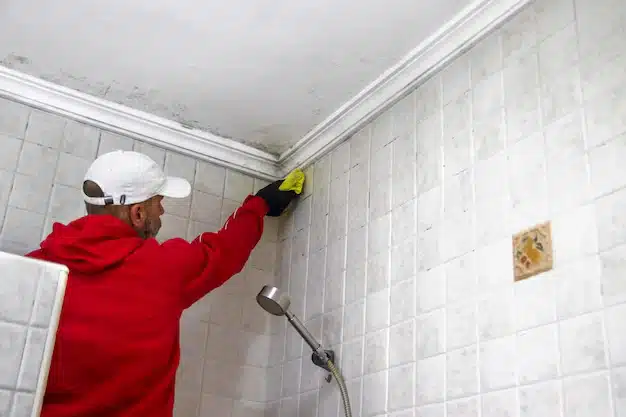
Safety First: What You Need Before You Start
Protecting yourself before you start cleaning is critical. Mold releases spores into the air when disturbed, and inhaling those spores can irritate your respiratory system, trigger allergies, and cause more serious health issues with prolonged exposure.
Gather the following before you begin:
A N95 respirator mask or higher rated mask will protect your lungs. Safety goggles will shield your eyes from drips and spray. Rubber gloves will keep the cleaning solution and mold from contacting your skin. Old clothing or a disposable coverall is a smart choice since mold can stain. A drop cloth or plastic sheeting over the floor and any bathroom fixtures will protect them from drips.
Also make sure the bathroom is ventilated. Open a window or run the exhaust fan while you work. If neither is available, prop the bathroom door open and point a fan into the room.
How to Remove Mold From Bathroom Ceiling: Step by Step
Step 1: Choose Your Cleaning Solution
Several effective options are available depending on the severity and your preferences.
White vinegar is a natural and effective option for light mold. Fill a spray bottle with undiluted white vinegar and apply it directly to the affected area. Vinegar kills the majority of common mold species and is safe for most painted surfaces.
A bleach solution works well for more stubborn or widespread mold. Mix one cup of bleach with one gallon of water. Never mix bleach with vinegar or ammonia based cleaners as this creates toxic fumes. Bleach is best reserved for non porous surfaces.
Hydrogen peroxide at three percent concentration is another gentler alternative. It is less harsh than bleach and still effective against mold on bathroom ceilings.
Baking soda paste can be used as a scrubbing agent after the initial spray treatment to remove staining.
Step 2: Apply the Solution
Spray your chosen solution generously onto the moldy area. Do not wipe it off immediately. Let it sit for ten to fifteen minutes so it can penetrate and kill the mold at the surface level. This dwell time is important and often skipped when people are in a hurry.
Step 3: Scrub the Area
Use a stiff bristle brush or an old toothbrush for smaller spots. Scrub in circular motions. For larger patches, a mop or sponge on an extension handle makes it easier to reach the ceiling without straining your neck or back. Work from the outside edges of the mold patch toward the center to avoid spreading spores to clean areas.
Step 4: Rinse and Dry
Wipe down the cleaned area with a damp cloth to remove residue. Then dry the ceiling thoroughly using a clean towel or by running the exhaust fan for at least thirty minutes. Leaving moisture behind is the fastest way to invite mold back.
Step 5: Dispose of Materials
Place all used cloths, brushes, and protective gear into a sealed plastic bag before disposing of them. Do not shake out cloths inside the bathroom, as this can release trapped spores back into the air.
When DIY Is Not Enough
DIY cleaning works well for small patches of surface mold, typically areas smaller than ten square feet. But if the mold covers a large section of the ceiling, keeps coming back despite repeated cleaning, or appears along with water stains and soft ceiling material, the problem runs deeper than the surface.
Mold that has penetrated drywall or ceiling tiles requires professional remediation. This is especially true for black mold, which can release mycotoxins harmful to human health. In these situations, attempting to clean it yourself can actually make things worse by disturbing spores and spreading contamination throughout your home.
If your mold problem is tied to a roof leak, a plumbing issue above the ceiling, or ongoing condensation that you cannot control, professional assessment and treatment are the right move. The team at Rhino Restoration’s bathroom mold removal service handles exactly these types of situations, with trained technicians who can safely remove mold, identify the moisture source, and restore your ceiling back to a clean and healthy condition.
How to Prevent Mold From Coming Back
Cleaning mold is only half the battle. Prevention is what keeps it from returning in two weeks. Here are the most effective steps to stop regrowth:
Run your exhaust fan during every shower and for at least twenty minutes afterward. If your fan is old or undersized, upgrading to a higher CFM rated model makes a significant difference in a bathroom that gets heavy use.
Keep showers shorter when possible and open a window after bathing to let humid air escape. Even cracking the bathroom door helps air circulation.
Wipe down the ceiling and walls after especially steamy showers using a squeegee or dry cloth. This takes seconds and removes the moisture before mold has a chance to form.
Apply a mold resistant paint to your bathroom ceiling after cleaning. These paints contain fungicides that inhibit mold growth and are widely available at hardware stores.
Inspect your ceiling periodically for new spots, especially after periods of heavy rain or if you notice any new water stains. Catching mold early means cleaning a small patch instead of dealing with a full remediation.
Fix any leaks promptly. A slow drip from a pipe above the ceiling might go unnoticed for months, during which time it is quietly feeding a mold colony.
When to Call a Professional
If you have cleaned the mold but it returns within days, if the ceiling feels soft or spongy in the affected area, if the mold has spread to the walls as well, or if anyone in the household has started experiencing unexplained respiratory symptoms, do not wait. These are signs of a more serious problem that requires professional attention.
Professional mold remediation teams have the equipment and training to contain the area, remove contaminated materials safely, treat surfaces with industrial grade antimicrobials, and test air quality after the job is done to confirm the mold is truly gone.
Final Thoughts
Learning how to remove mold from bathroom ceiling the right way protects both your home and your health. Start by gathering proper safety gear, apply an effective cleaning solution, scrub thoroughly, and dry the area completely. Then take the preventive steps that keep moisture from building up again. For minor mold issues, a careful DIY approach gets the job done. For anything beyond surface level mold or recurring growth, professional remediation is the safest and most permanent solution. Do not let mold go unchecked. The longer it sits, the deeper it spreads and the harder it becomes to remove.
GET EXPERT HELP TODAY!
Rhino Restoration is committed to helping you recover after disasters, bringing your property back to normal with care and expertise. We provide a full range of restoration services to meet all your residential needs.
About
Contact
Copyright © 2024 Rhino Restoration