How to Remove Mold from Bathroom Ceiling: A Complete Homeowner Guide
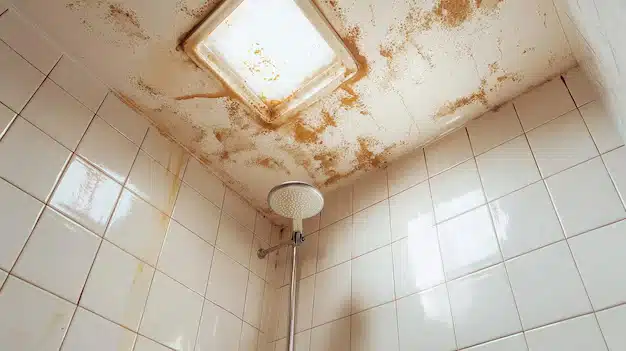
How to remove mold from bathroom ceiling is one of the most common questions Tampa homeowners ask, especially during humid months when moisture levels stay high all year long. Bathroom ceilings are the perfect breeding ground for mold because of constant steam from hot showers, poor ventilation, and trapped humidity. If you have noticed dark spots, fuzzy patches, or a musty smell above your shower, mold is likely already spreading. Ignoring it can lead to bigger problems, including health issues, ceiling damage, and costly repairs. The good news is that with the right tools, safety steps, and a clear plan, you can remove most surface mold yourself. For severe cases or recurring outbreaks, a trusted local team like the best restoration company in Tampa can save you time, stress, and money.
In this complete guide, we will walk you through everything you need to know to clean your bathroom ceiling safely, prevent regrowth, and know exactly when it is time to call a trusted professional for lasting results.
Why Mold Grows on Bathroom Ceilings
Before treating the problem, it helps to understand the cause. Bathrooms are warm, damp, and often lack proper airflow, which creates the ideal environment for mold spores to settle and grow quickly on ceiling surfaces.
The main reasons mold appears on bathroom ceilings include:
- Steam rising from hot showers without proper ventilation
- A weak, clogged, or broken bathroom exhaust fan
- Leaky pipes or roof leaks above the ceiling
- High indoor humidity, especially in coastal Florida areas
- Poor insulation that causes condensation
- Painted surfaces that trap moisture underneath layers
- Lack of natural sunlight to dry out the space
When moisture sits on a ceiling for hours after every shower, mold can begin growing within 24 to 48 hours. That is why early action and consistent prevention matter so much for every homeowner.
Signs You Have Mold on Your Bathroom Ceiling
Sometimes mold is obvious, but other times it hides until the problem grows much larger. Look for these common warning signs in your bathroom space:
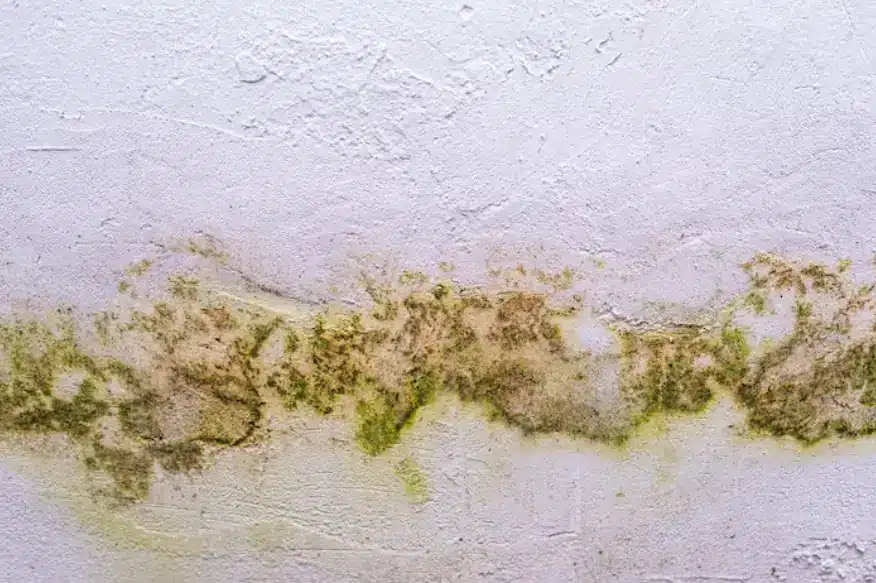
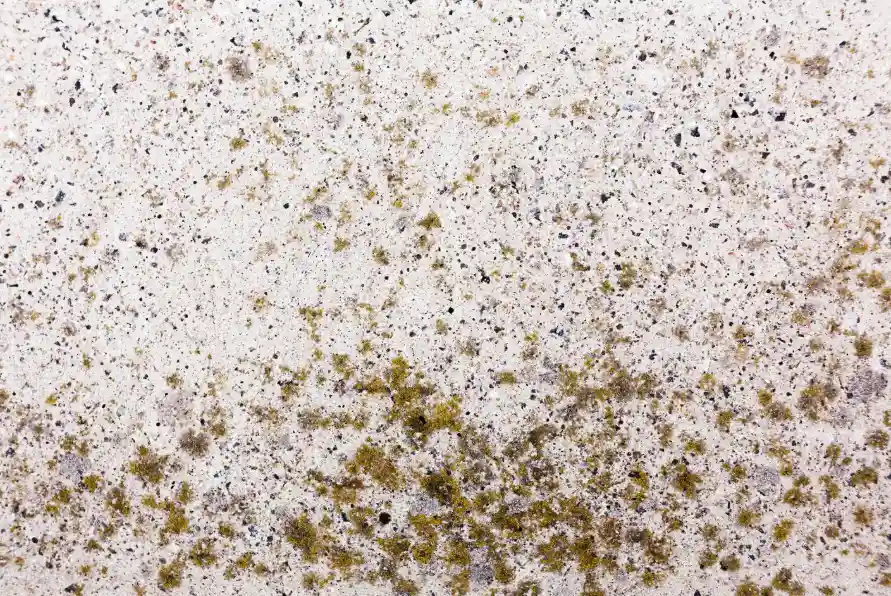
- Black, green, or brown spots on the ceiling surface
- A musty or earthy smell that lingers after deep cleaning
- Peeling, bubbling, or cracking paint near the ceiling
- Soft, damp, or sagging ceiling areas
- Increased allergy symptoms like coughing, sneezing, or itchy eyes
- Water stains that keep returning even after touch ups
If you notice any of these, you need to act quickly before the mold spreads to walls, vents, light fixtures, or attic insulation above.
Safety First: What You Need Before You Start
Removing mold without protection is risky. Mold spores can irritate your lungs, skin, and eyes, especially if you are sensitive or have asthma or allergies. Always wear proper safety gear before climbing a ladder to clean.
Gather these essential items first:
- Safety goggles and an N95 mask or respirator
- Rubber gloves and long sleeves with old clothes
- A sturdy step ladder and drop cloths
- A spray bottle, soft sponge, and microfiber cloth
- A stiff brush for stubborn spots and a bucket of warm water
Open the bathroom window if you have one and turn on the exhaust fan to keep air moving while you work safely.
Choose the Right Cleaning Solution
You do not need expensive chemicals to remove most ceiling mold. Several household solutions work very well, depending on how bad the mold growth is.
White Vinegar: Kills more than 80 percent of mold species and is safe for most painted ceilings. Pour undiluted into a spray bottle and use directly.
Baking Soda Paste: Mix one tablespoon of baking soda with a cup of water. Shake well and spray, or apply as a paste for tough mold spots.
Hydrogen Peroxide: A 3 percent solution kills mold and lightens stains. Spray it on, wait 10 minutes, then scrub gently with a sponge.
Diluted Bleach: For non porous ceilings, mix one cup of bleach with one gallon of water. Never mix bleach with vinegar or ammonia, as it creates dangerous toxic fumes.
Step by Step: How to Remove Mold from Bathroom Ceiling
Now that you have your supplies and solution ready, follow these steps carefully for the best and safest results.
Step 1: Prepare the Bathroom. Remove towels, rugs, toiletries, and anything that could be damaged by drips. Cover the floor with a drop cloth and turn on the exhaust fan.
Step 2: Put on Safety Gear. Wear goggles, gloves, and your N95 mask before climbing the ladder. Mold spores release into the air as soon as you disturb them.
Step 3: Spray the Affected Area. Generously spray your chosen cleaning solution onto the moldy spots. Let it sit for 10 to 15 minutes so it can penetrate and kill the mold at the root.
Step 4: Scrub Gently. Use a soft sponge for small areas and a stiff brush for stubborn patches. Scrub in circular motions, but avoid pressing too hard on painted surfaces.
Step 5: Wipe Clean. Use a clean microfiber cloth dipped in warm water to wipe away the residue. Repeat the process if any mold remains visible.
Step 6: Dry the Ceiling Completely. Use a dry towel and run the fan or a portable dehumidifier to fully dry the area. Mold returns quickly if any moisture remains. For lasting protection from regrowth, our bathroom mold removal team can apply professional grade treatments that go far beyond surface cleaning.
Step 7: Repaint If Needed. Once dry, apply a mold resistant primer and paint to seal the surface and prevent future mold growth completely.
When to Call a Professional
Some mold problems are too big or too dangerous to handle alone. Call a certified restoration team right away if:
- The mold covers more than 10 square feet of ceiling
- It keeps coming back even after thorough cleaning
- The ceiling feels soft, sagging, wet, or unstable
- You smell strong mustiness even after deep cleaning
- You see black mold, which can be toxic to humans
- Anyone in the home has serious allergies, asthma, or a weakened immune system
Professionals have the equipment, training, and protective gear to handle hidden mold inside ceilings, vents, and insulation safely and completely.
How to Prevent Mold from Coming Back
Cleaning the ceiling is only half the job. Without changing the conditions that caused the mold, it will return within just a few weeks of cleaning.
Try these proven prevention tips for long lasting results:
- Run the exhaust fan during every shower and for 30 minutes after
- Keep showers shorter and slightly cooler when possible
- Wipe down ceilings and walls with a dry towel after long, steamy showers
- Use a dehumidifier in humid months to control moisture levels
- Fix any plumbing or roof leaks immediately when noticed
- Repaint with mold resistant bathroom paint every few years
- Keep indoor humidity levels below 50 percent at all times
- Inspect the attic above the bathroom for any hidden moisture issues
Small daily habits make the biggest difference in keeping your bathroom dry, fresh, and healthy year round.
Common Mistakes to Avoid
Many homeowners unintentionally make mold problems worse. Watch out for these common mistakes during cleaning:
- Painting over mold without removing it first
- Mixing dangerous cleaning chemicals like bleach and vinegar
- Skipping proper safety gear during the cleaning process
- Using only water to wipe mold, which simply spreads the spores
- Ignoring leaks and assuming the mold is just cosmetic
- Waiting too long to address recurring mold issues
- Using rough brushes that damage ceiling paint and texture
A small mold spot today can become a full ceiling problem in just a month, especially in Tampa’s humid coastal climate.
Final Thoughts
Knowing how to remove mold from bathroom ceiling gives you the power to protect your home, your air quality, and your family’s health. With the right tools, safety steps, and prevention habits, most surface mold can be removed in a single afternoon of careful work. However, if mold keeps returning, covers a large area, or comes with leaks or strong odors, it is a clear sign of a deeper issue that needs expert attention right away.
Rhino Restoration helps Tampa homeowners handle mold problems quickly, safely, and affordably. Our certified team uses advanced equipment to remove mold at the source, repair any damage, and protect your home from future outbreaks. Whether you are facing a small bathroom spot or a major moisture issue, we are here to help every step of the way with proven results.
If your bathroom ceiling shows signs of mold that will not go away, do not wait. Call Rhino Restoration today for a fast, reliable inspection and a lasting mold removal solution.
GET EXPERT HELP TODAY!
Rhino Restoration is committed to helping you recover after disasters, bringing your property back to normal with care and expertise. We provide a full range of restoration services to meet all your residential needs.
About
Contact
Copyright © 2024 Rhino Restoration